
Use Pandectes Consent Event with Shopify Custom Pixel
Overview
This article shows how to create a custom pixel on your Shopify store that listens to the Pandectes consent event, so you can run your own code (for example Google Tag Manager) only with the visitor's consent.
Turn on Pandectes events
- In Shopify Admin, go to Apps > Pandectes GDPR > Integrations.
- On the Pandectes events card, click Configure.
- Turn on the toggle at the top of the page and click Save.
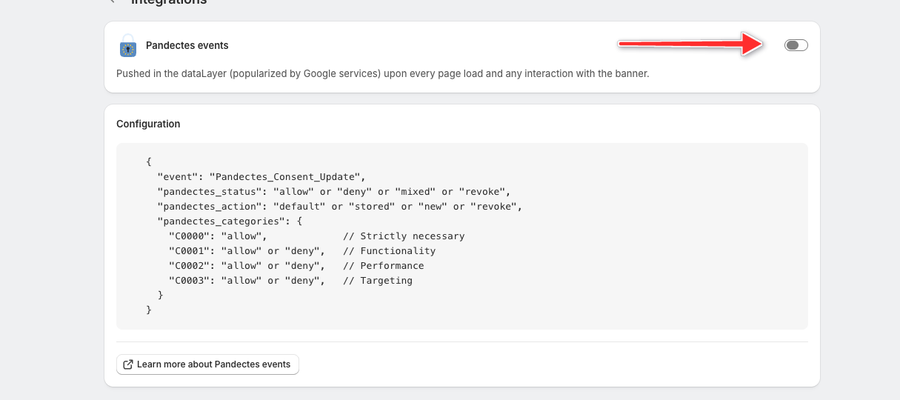
Pandectes now pushes the Pandectes_Consent_Update event into the dataLayer on every page load and on every interaction with the banner. The Configuration box shows the event structure. The event is also available to the Shopify Web Pixels API and to custom pixels in Customer events.
Create custom pixel code
- Go to your store Settings > Customer Events section
- Click on the Add custom pixel button and give a name such as Cookie Consent Pixel and click Add pixel
- In the Customer privacy section select in the Permission section the option Not required to let the pixel always run
- In the Code area remove the default content and add the Pixel code provided below:
analytics.subscribe("Pandectes_Consent_Update", event => {
    //run your custom code here ex. GTM
});
- Save the pixel.
- Connect the pixel.
Updated on: 27/10/2026
Thank you!