
Skroutz Order Management Guide
Overview
After Skroutz orders are synchronized with Shopify, you can manage them from the Skroutz Connect block inside each Shopify order.
This guide explains the order lifecycle, the information shown in the management page, and how to accept, decline, upload documents, print vouchers, and track fulfillment.
Before you start
- The Skroutz Connect app is installed and connected to your Shopify store.
- Order synchronization is enabled. For setup instructions, see Skroutz Order Integration: A Complete Setup Guide.
- The Skroutz Connect block is pinned in the Shopify order view.
Order management through Shopify
Select Manage order in the Skroutz Connect block to open the order management page inside the app.
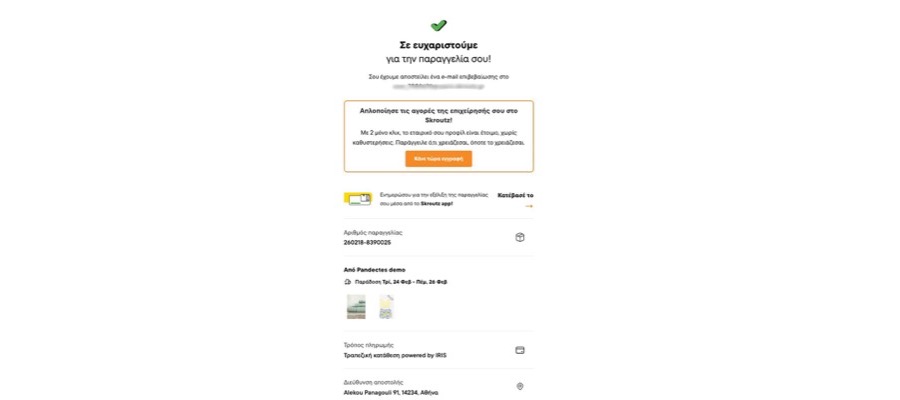
Step 1: A customer places an order on Skroutz
The customer places an order through the Skroutz marketplace. The order is then sent to your store through the integration.
Step 2: The order is synchronized with Shopify
The order is created or updated automatically in Shopify through webhooks. The order receives a tag based on its Skroutz status. Tags use the skroutz prefix.
Possible tags include:
skroutz openskroutz acceptedskroutz rejectedskroutz cancelledskroutz expiredskroutz dispatchedskroutz deliveredskroutz partially returnedskroutz returnedskroutz for returnskroutz partially delivered

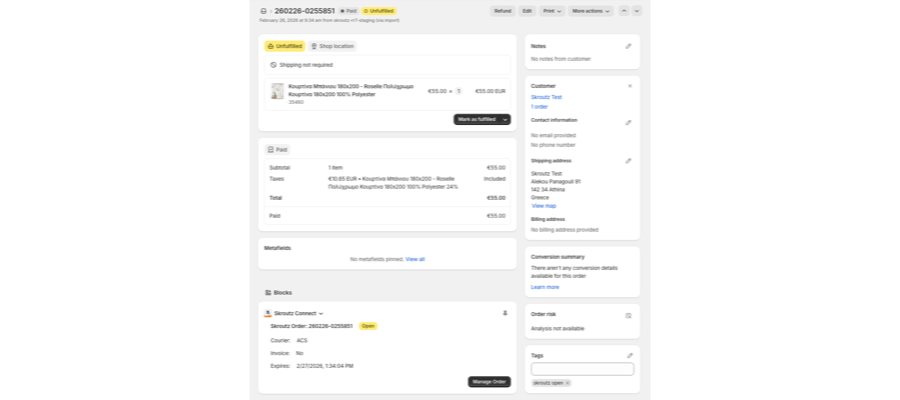
Step 3: Review and manage the order
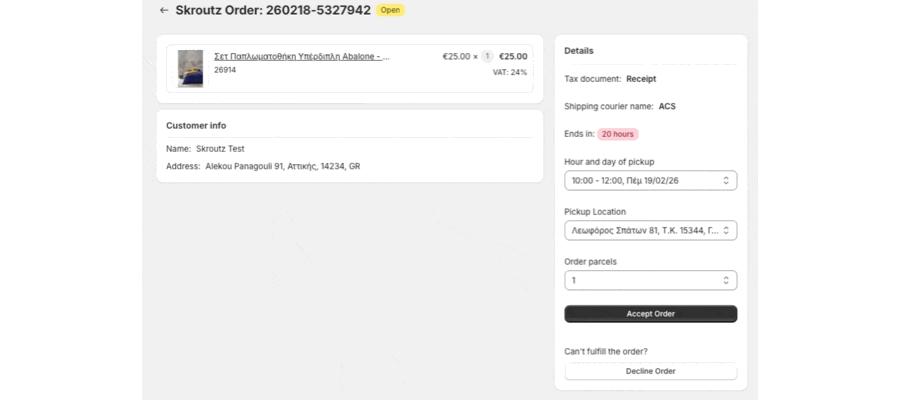
The order page is separated into cards with the information you need to process the order.
Products
The top card lists the products in the order and their relevant details.
Customer information
The Customer Info card can include:
- Name
- Address
- Collection point
- Phone
- Pickup from store
- Gift indicator
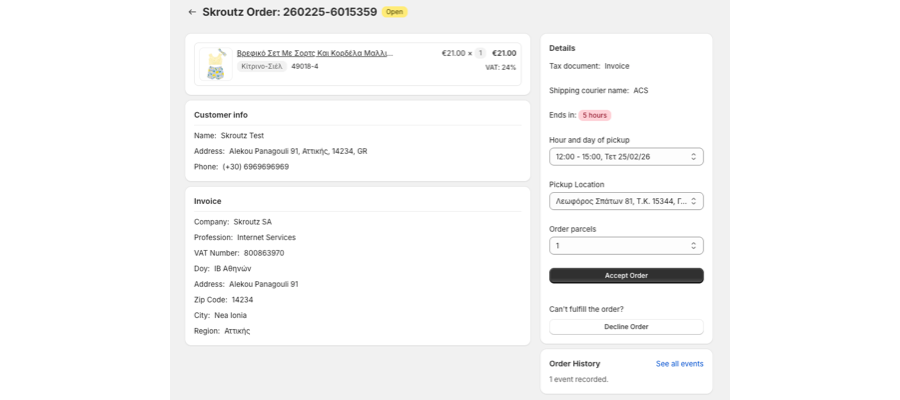
Invoice information
The Invoice card appears when the customer requests an invoice. It can include:
- Company
- Profession
- VAT number
- Tax office
- Address
- ZIP code
- City
- Region
If the invoice request includes reduced VAT, the card can also show the representative ID type, representative ID number, representative OTP verification, and representative mobile phone.
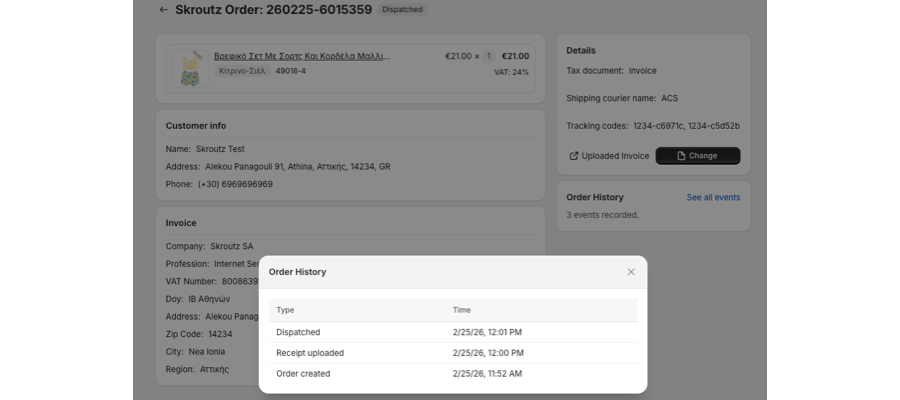
Order details
The Details card can include:
- Tax document, the document to include in the physical order or upload to Skroutz.
- Shipping courier name, the courier that will collect the order.
- Ends in, the time remaining to accept the order.
- Pickup time and day, selected from the pickup windows provided by Skroutz.
- Pickup location, selected when more than one pickup location is available.
- Order parcels, the number of parcels needed to ship the order. The default is one.
Order history
The order history card records changes to the order. Select See all events to open the event history with the relevant dates and times.
Events can include Order Created, Accepted, Declined, Receipt Uploaded, Receipt Changed, and Dispatched.
Step 4: Accept the order
- Review whether the order requires a receipt or invoice.
- Select the pickup time window.
- Select the pickup location if more than one location is available.
- Enter the number of parcels if you need more than one. Leave it as one when the order fits in a single parcel.
- Select Accept order.
Step 5: Upload a receipt or invoice
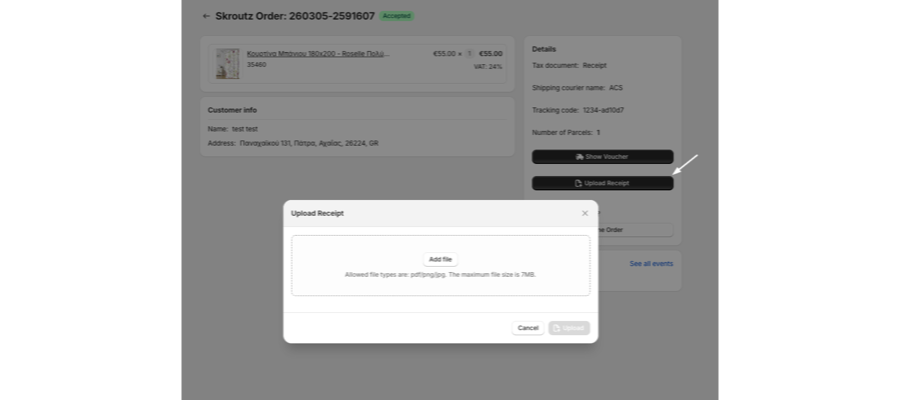
After the order is accepted, you can upload the receipt or invoice to Skroutz through Shopify.
- Select Upload in the order management page.
- Drag the document into the upload window, or select the option to browse for it.
- Select Upload.
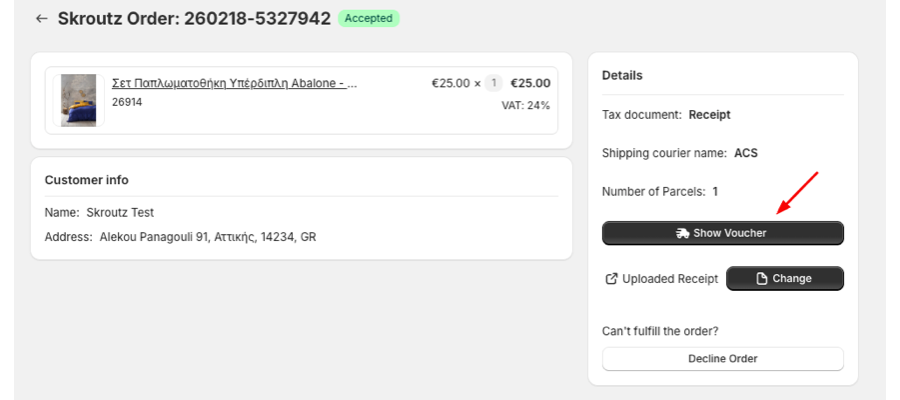
If a document is already uploaded, you can view it and select Change to replace it.
Step 6: Print the courier voucher
When the order is accepted and Skroutz provides a courier voucher, the Show Voucher button appears. Select it to open the voucher in a new page, then print it.
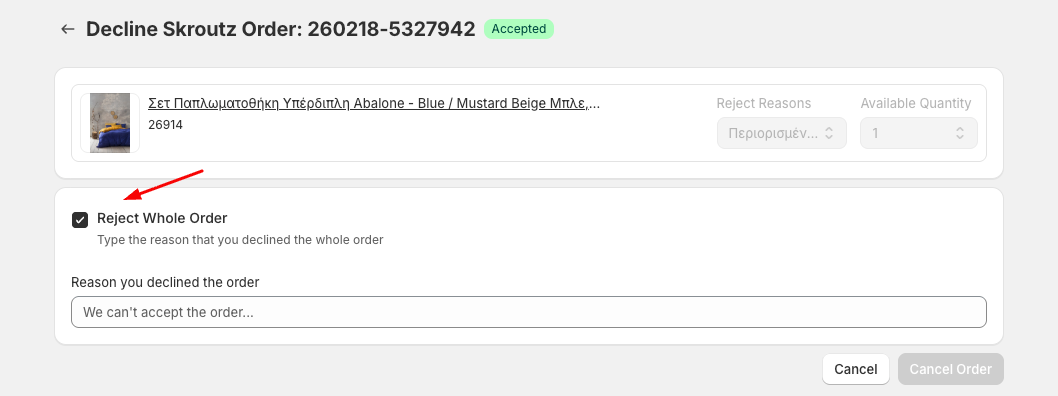
Step 7: Decline the order
You can decline an order before it is dispatched.
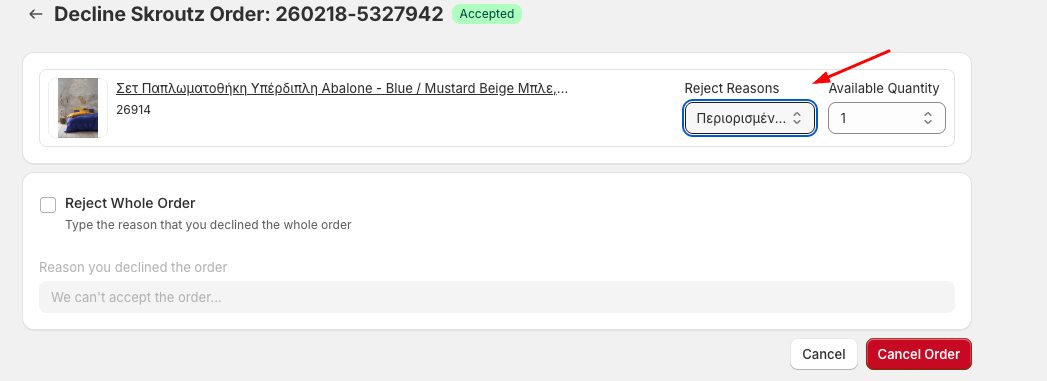
- Select Decline order.
- Choose whether to decline one or more order items, or decline the entire order.
- If you choose Limited items, enter the quantity currently available in stock.
- If you decline the entire order, enter the reason.
- Select Cancel order to submit the choice.
Fulfillment status in Shopify
When the Skroutz order status changes to Dispatched, the assigned courier has collected the package. Shopify automatically marks the corresponding order as Fulfilled.
Updated on: 23/09/2026
Thank you!